

Facebook Automated Ads: An Ultimate Guide to Get You Started


If you are into social media marketing, then you might already be familiar with dynamic ads. To make it easier for us to target our audience, Facebook has also come up with the concept of automated dynamic ads.
The platform leverages AI-enabled algorithms to present different versions of your content to the target audience. Here, I will let you know more about Facebook automated ads and how you can make the most of them.
Facebook Automated Ads: Basics and Key Benefits
Automated ad is a new concept of Facebook advertising that provides a more personalized experience for your targeted audience. Advertisers can access a bunch of options to run ads for a specific set of audience on a preferred budget. Later, Facebook will eliminate all the guesswork by boosting your best-performing content and further improving it.

You can run Facebook automated ads to get more leads, gain website traffic, and so on. Most advertisers prefer them due to the following key benefits:
- Dynamic content: Facebook will help you come up with up to 6 different versions of your ads. You can set up different call-to-actions/creatives and can later check their results to identify the best performing content.
- Customized audience: Furthermore, Facebook will help you identify your target audience based on the existing performance of your page. You can also add suggestions to target specific audiences based on their location, age, or interest.
- Time-saving: Needless to say, the manual process of coming up with different ad types and measuring their results will take a lot of time. With automated ads, everything will be taken care of by Facebook, and you will even get timely notifications regarding the performance of your ads.
- Data-driven results: With the inbuilt options in Facebook, you can instantly check the return on ad spends (ROAS) via tons of existing metrics. In this way, you can easily make the most of your ad budget.
How to Set up Facebook Automated Ads: A Stepwise Guide
As you can see, with the help of Facebook automated ads, you can easily target your audience while saving your resources. The best part is that setting up these automated ads on Facebook is extremely easy and can be done by visiting your page. Here’s how you can also start with automated ads on Facebook in no time.
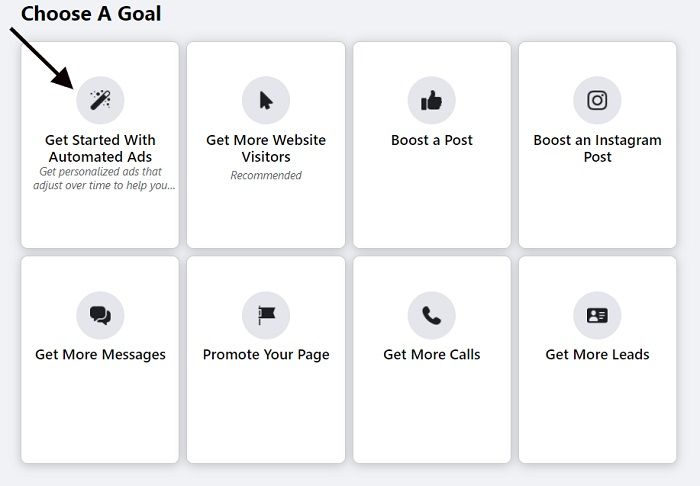
Step 1: Getting Started with Automated Ads
Let’s start by exploring how to set up automated ads on Facebook. To do this, you just have to go to your Facebook page and click on the “Promote” button.

Facebook will now present different options to promote your page and content. From here, you can simply select the “Automated Ads” option to commence the process.
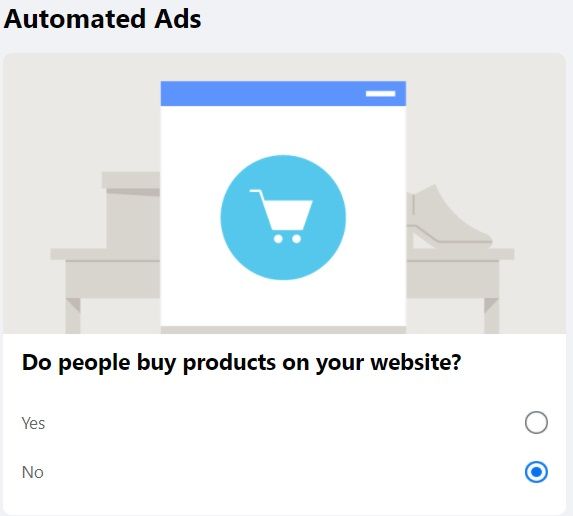
Step 2: Enter Personalized Details for Ads
This will simply initiate a dedicated wizard for Facebook automated ads that you can follow. You can first select an account for which you want to run the ad and then pick a preferred CTA (Call to Action). That is, do you want people to download something, fill up a form, visit your website, or take any other action.
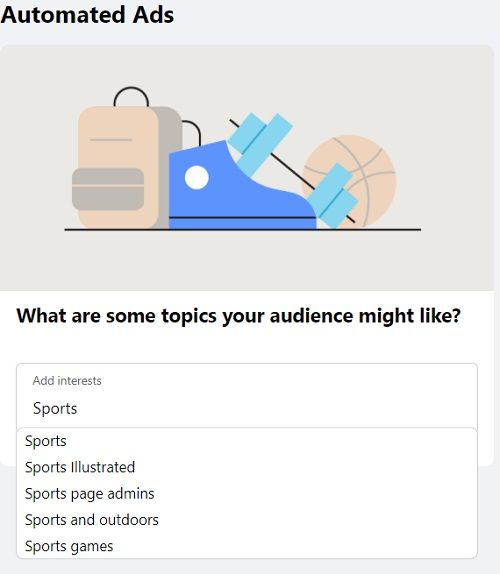
As you proceed, you will get the following option where you can handpick the interest of your audience. Facebook will automatically analyze your audience to make things simpler for you.
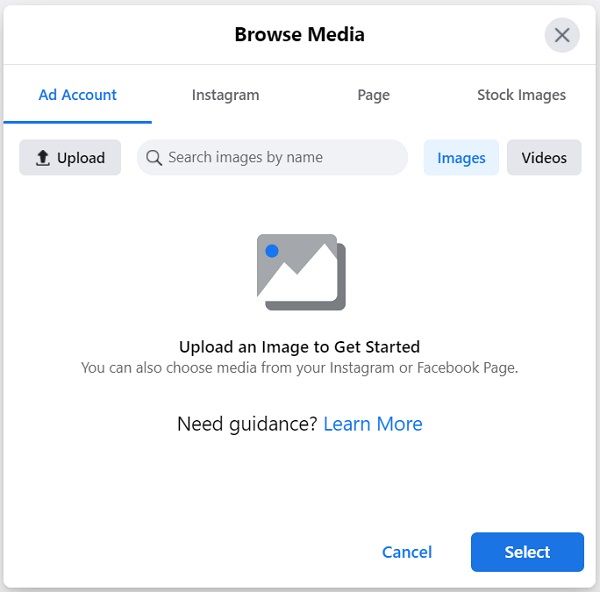
Step 3: Upload Media to Create Your Ads
Now, you just have to upload appropriate media files that would be displayed as ads on Facebook. If you already have a creative in place, then you can simply upload it here. You can use Facebook Studio to come up with some creative designs as well. Just make sure that you follow the recent guidelines to ensure your ad won’t be rejected by Facebook.
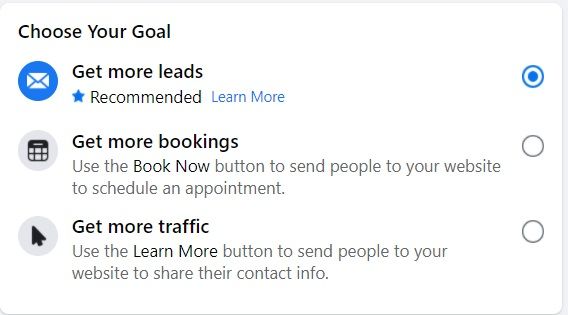
After uploading the creative, you can select your goal for running the ad. For example, it could be to get more leads, bookings, traffic, and so on.
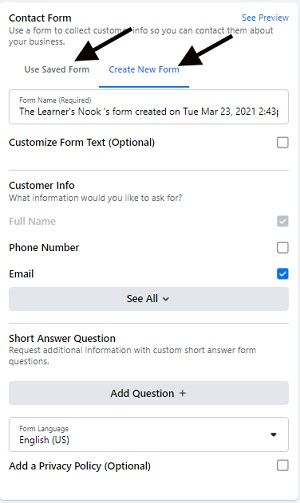
In case you want your audience to fill up a form, then you can create one by entering the appropriate details here. You can also simply upload an existing form from the “Saved form” section here.
Step 4: Preview & Customize Your Ads
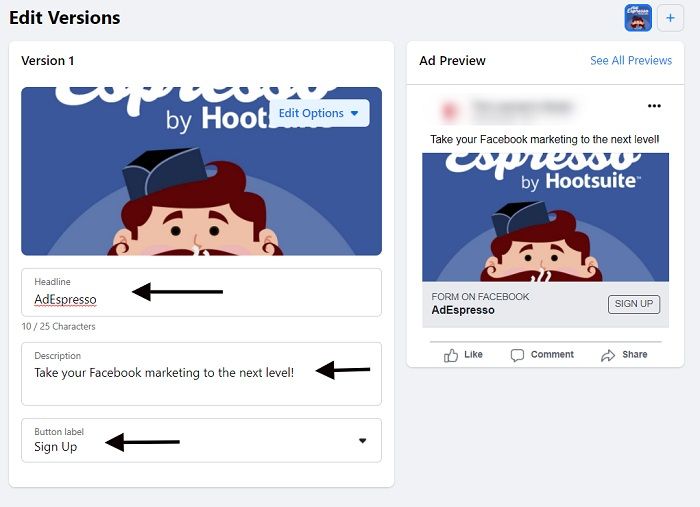
The Facebook automated ads wizard will now display a preview of your content. You can see how your ads will be displayed on desktop and mobile. Also, you can simply enter details about its headline, description, and customize its button label.
Before the Facebook ad would be enabled, you also have to select a range for the daily budget that you can spend.

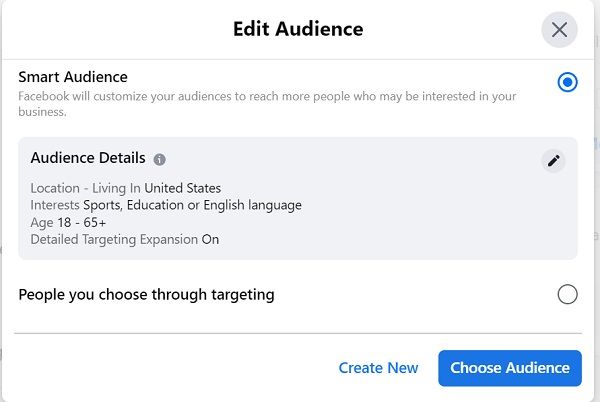
To target your audience better, you can apply numerous filters here. You can also use a smart audience feature that will let you enter parameters like age, interest, location, and more for your audience.
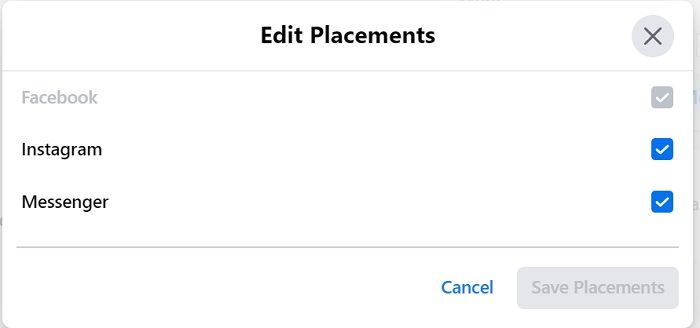
Lastly, you can select a preferred platform where you want your ads to display. It could be Facebook, Instagram, or Messenger (you can also select multiple platforms to improve the visibility of your content).
After entering all these details, you can simply submit the ad for review on Facebook. In the end, the ad will go live, and you can manage it via your Ad Manager account.
How to Monitor Your Automated Ads on Facebook?
Setting up Facebook automated ads is only a job half-done. After a while, you need to view the results of your ads to calculate their ROI. To do this, you can just go to your Facebook page (where you ran ads) and visit its “Ad Center”.
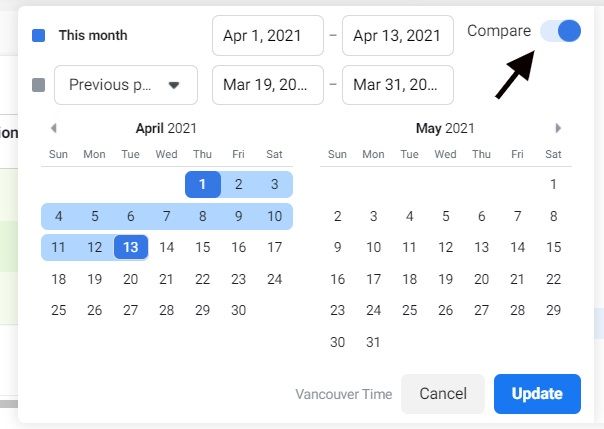
As the Ad Center window launches, you can go to the “Automated Ads” feature from the sidebar and click on the “View Results” button. That’s it! Facebook will now display the overall performance of your automated ads based on different parameters. If you want, you can also filter these results by selecting a preferred duration.
Try DSers to Start Your Online Dropshipping Store
With the help of Facebook automated ads, you can certainly get more customers and leads for your online store. Though, if you want to manage your store and explore dropshipping services, then DSers should be your go-to solution.
| Get Started Now to Grow Your Online Business with the Best AliExpress Dropshipping Tool - DSers! |
- You can explore thousands of products from trusted suppliers in different categories on DSers.
- With its unique Supplier Optimizer feature, you can instantly pick the best (and the most profitable) supplier for any product.
- DSers is available for free (with an additional premium version). It is the official AliExpress dropshipping tool, which is compatile with Wix, Shopify, and WooCommerce.
- You can order products in bulk, map variants, set up bundles, manage your inventory, come up with an affiliate marketing set up, and do so much more via DSers.
- DSers will also let you automatically track the order statuses of purchases and even sync tracking numbers to keep your customers informed.
Conclusion
As you can see, with the help of Facebook automated ads, you can easily save your time and resources. Not just that, using these dynamic ads, you can easily target your audience in a personalized way. Go ahead and follow the above-mentioned process to set up automated ads on Facebook as well.
Besides that, if you are planning to come up with an online dropshipping store, then simply explore DSers. It is the official AliExpress dropshipping tool that offers tons of features and can seamlessly be integrated with major eCommerce platforms.


 Company
 Why Choose DSers
 Blog
Blog
 Help Center


 Live Chat
