

How to Design a Shopify Custom Store from Scratch


You may have attempted to modify your current Shopify theme but found that it was more difficult than you had anticipated. You can even be searching for a company or a specific developer to do your Shopify customization.
Regrettably, though, tailoring Shopify is not an easy task. Here, let’s check out how to make a Shopify custom design for your own.
What Is Shopify Custom Design
With a Shopify custom design, you may employ Shopify specialists to create a shop design from scratch, assisting you in creating a Shopify store design that is exclusive to you.
A bespoke Shopify theme is created from the ground up, putting more emphasis on the features and components that the retailer explicitly wants than those that have previously been created by theme developers.
Here is a brief comparison of pre-made Shopify themes vs Shopify custom design.
Pros and Cons of Designing a Shopify Custom Store from Scratch
Let’s see the pros and cons of Shopify custom design rather than choosing a pre-made Shopify theme.
Pre-made Shopify themes are significantly less effective than custom Shopify designs. The advantages of creating your own Shopify theme include:
- Staying up to date: You decide which changes should be incorporated into your theme as the owner of your unique Shopify theme. These improvements will prevent Shopify platform-related updates from conflicting with one another and make updating to the most recent versions simple and error-free.
- Creative control: Every aspect of your website will be completely under your creative control, from the design and color scheme to the unique icons and fonts.
- Target the requirements of your audience: You may design a layout that will efficiently convert your users into consumers by building a Shopify theme from scratch.
- Flexibility in functioning: Without installing other programs or plug-ins, you may modify your theme to add the capabilities your company needs.
- Clean code: You may prevent code bloating and ensure quick website loading by implementing only the necessary code to run your website.
Without addressing the negative aspects of designing a unique Shopify theme, we cannot properly explain its advantages. The following are the two main drawbacks of building a bespoke Shopify theme from scratch:
- Cost: Installing a pre-made theme from a Theme Store vs. creating a completely customized website will always be more expensive. You will likely need to work with a Shopify development business to create and install your custom theme unless you are a developer. The price will vary based on your needs and the expertise of the Shopify development business you select.
- Time: Creating unique Shopify themes from scratch takes more time than installing one already available. The approximate time it takes to build a bespoke Shopify theme will range from several weeks to several months, depending on your design strategy.
How to Design a Shopify Custom Store from Scratch
Now, let’s go to the main part: How to design a Shopify custom store from scratch.
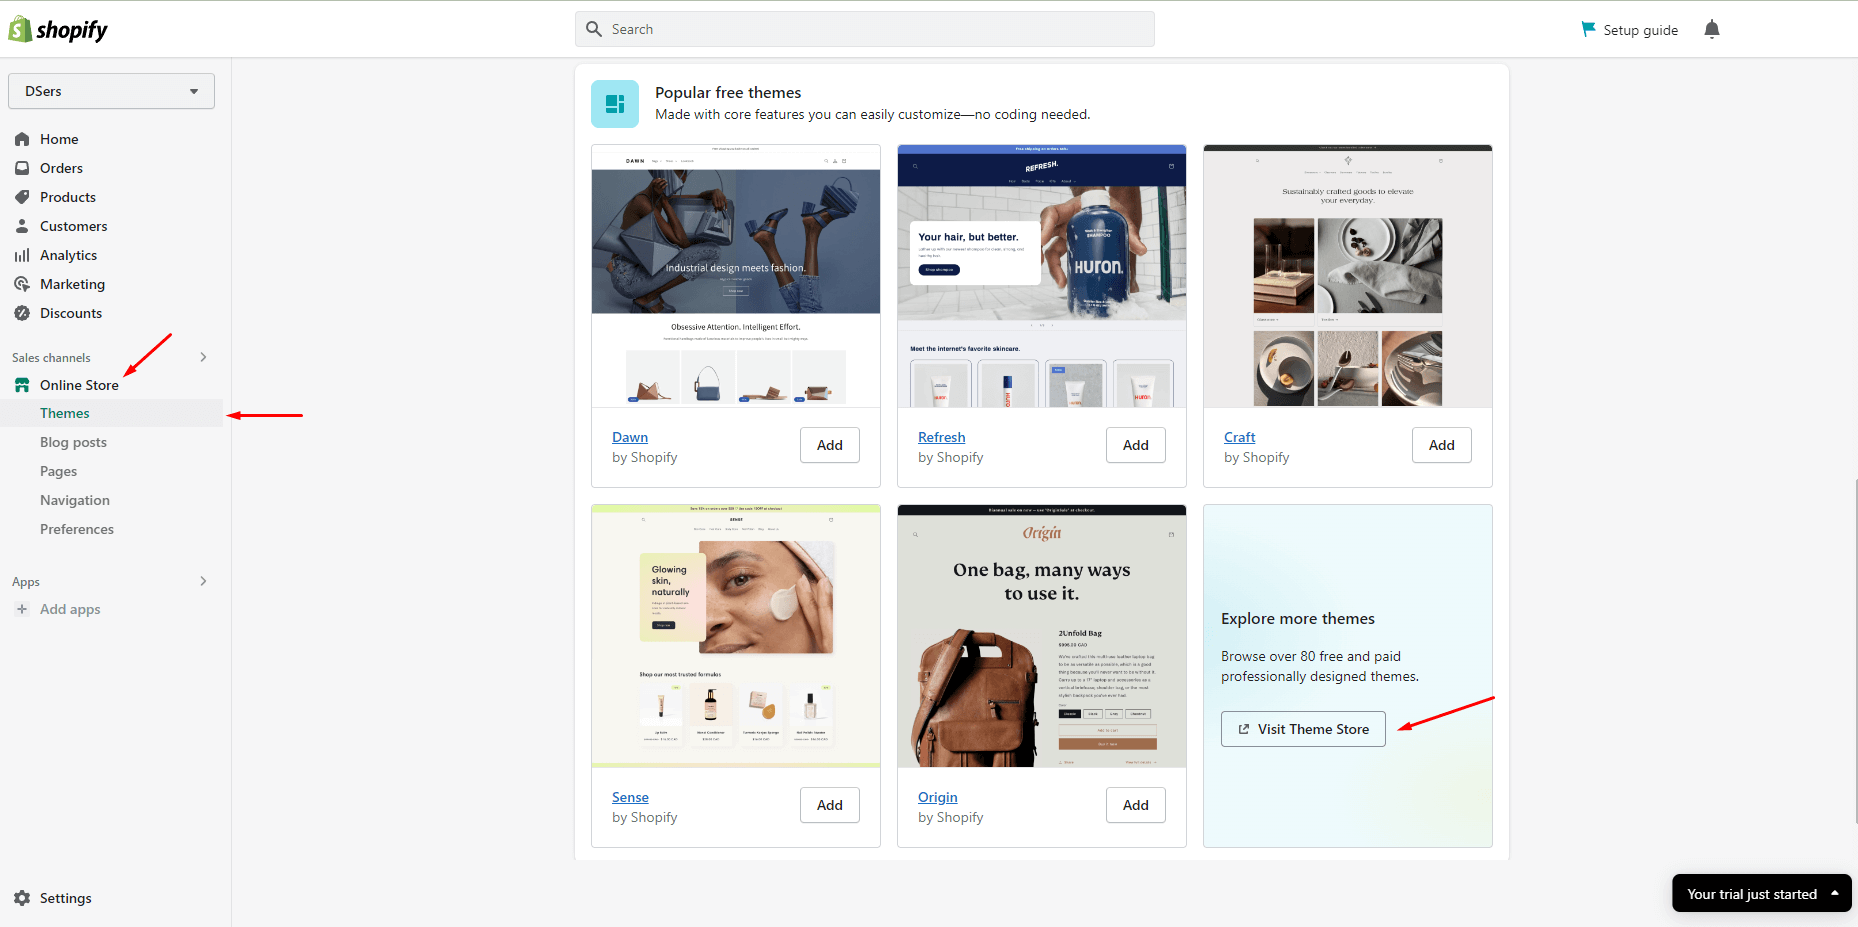
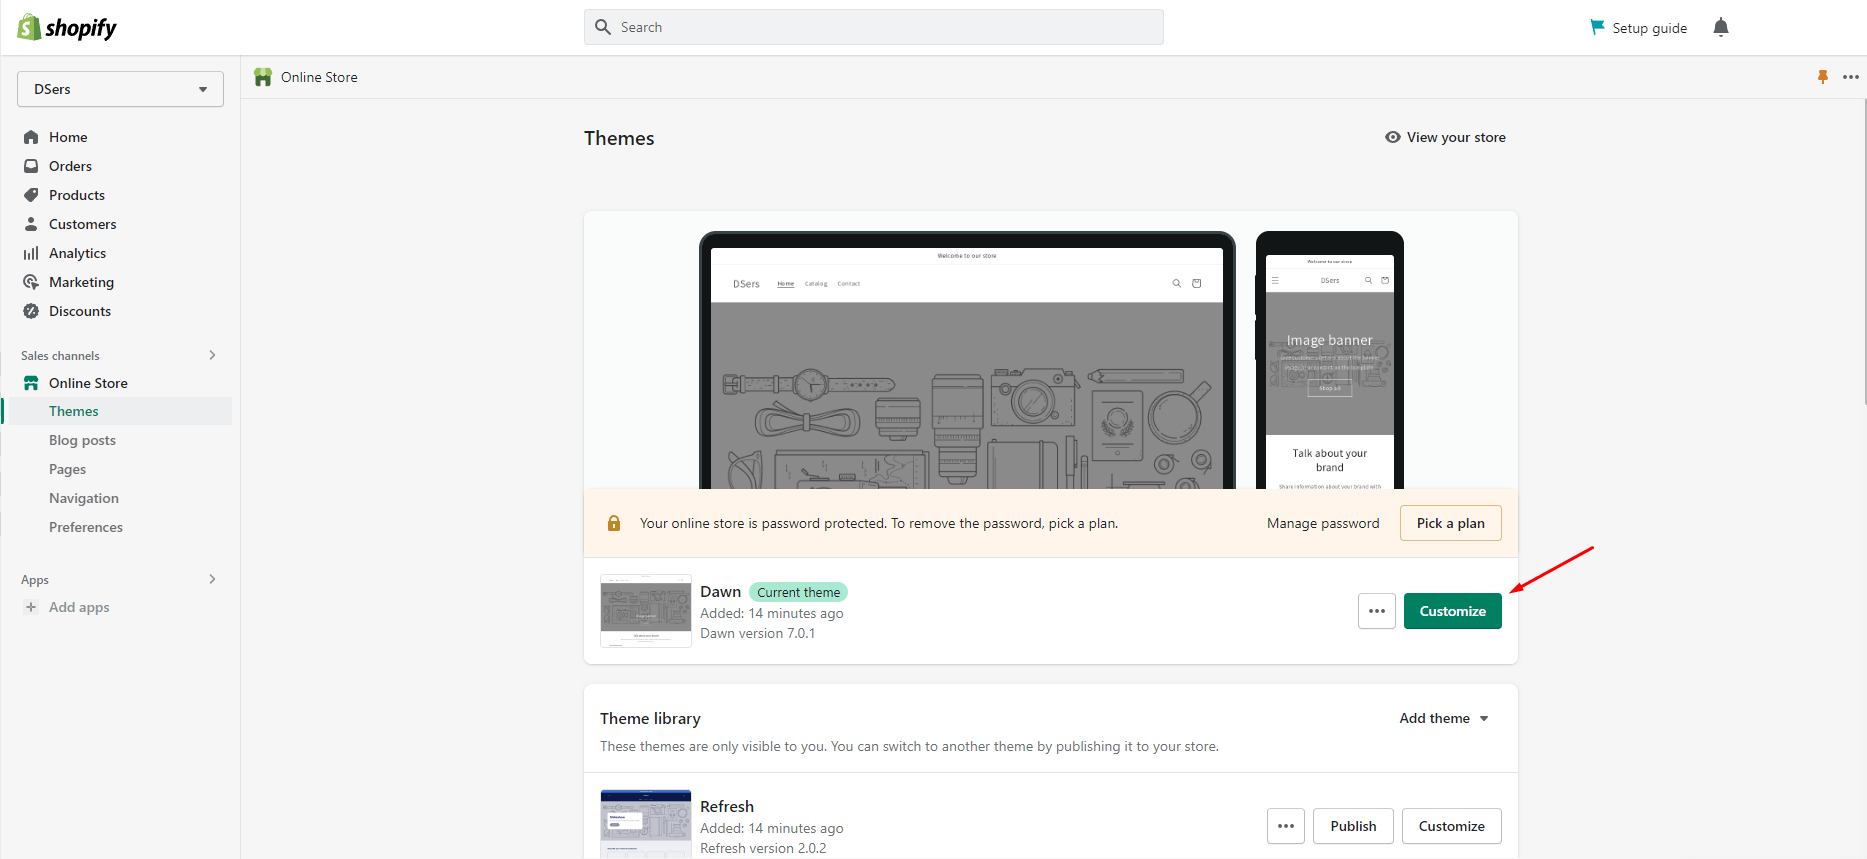
1. Choose a Pre-made Theme Template First
For the most convenience, it’s recommended to choose a pre-made theme first and start customizing it.
You may quickly enter the Theme Store after logging in: Select Online Store > Themes > scroll down to choose a template > select Add.
You can also choose Visit Theme Store to shop for more templates. Once the theme shop window has opened, you may filter the selections by clicking the All themes button in the upper middle. But keep in mind that using a premium pre-made theme template speeds up the customization of your Shopify theme.
The wonderful thing about Shopify is that they allow users unlimited free trials of premium themes as well. However, if you want to publish the theme live in your store, you'll have to pay.
2. Launch Shopify Customizing Features
Here are the two primary steps in customizing Shopify stores with Shopify themes, returning to your Shopify dashboard and staying on Themes:
- Changing theme options
- Altering the theme template
By using this technique, Shopify merchants frequently have greater flexibility and control over how the various page types used to build the shop are laid out. The Theme Editor will open after you click the Customize button to start modifying.
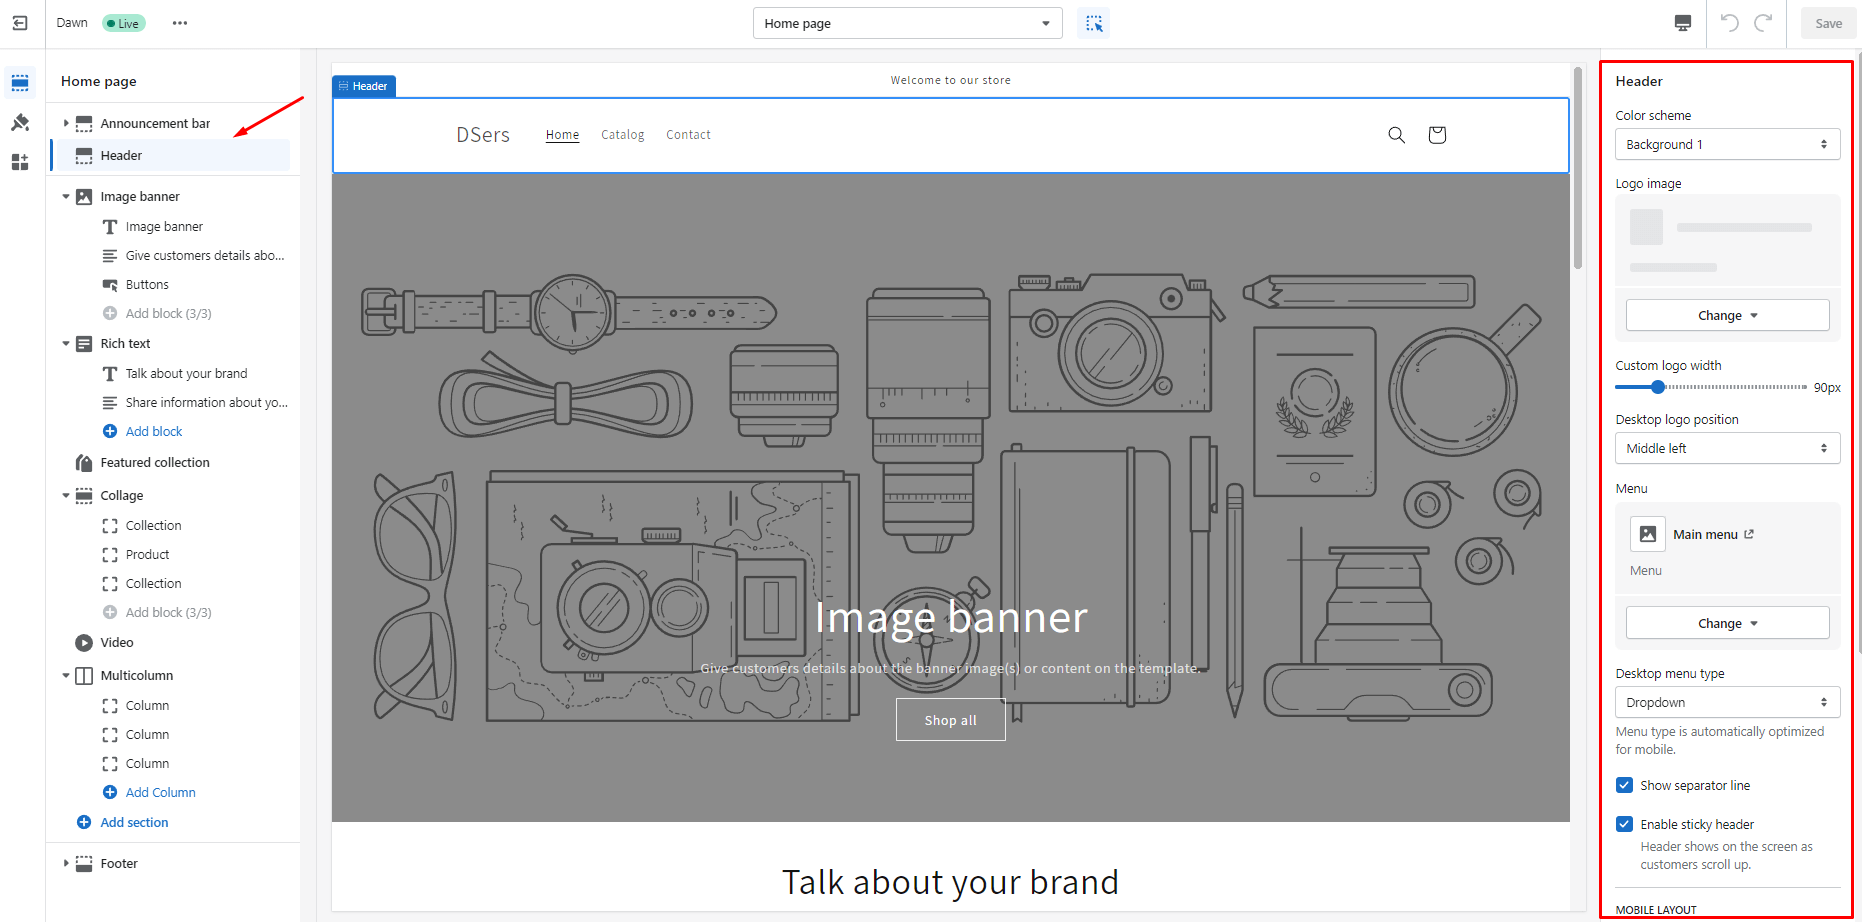
3. Customizing Header
A header, as its name suggests, is the top portion of any internet page. Every page of your Shopify site normally contains this part, and any updates made to it will be reflected on all shop pages.
Carefully consider how you want to modify this part. The navigation menu, divider line, and sticky header components are a few of the things you may fiddle with.
Click on the Header in the sectional panel menu on the left side of the page in the theme editor to alter whatever you'd like. To put the changes into effect after finishing them, click the Save button in the upper right corner.
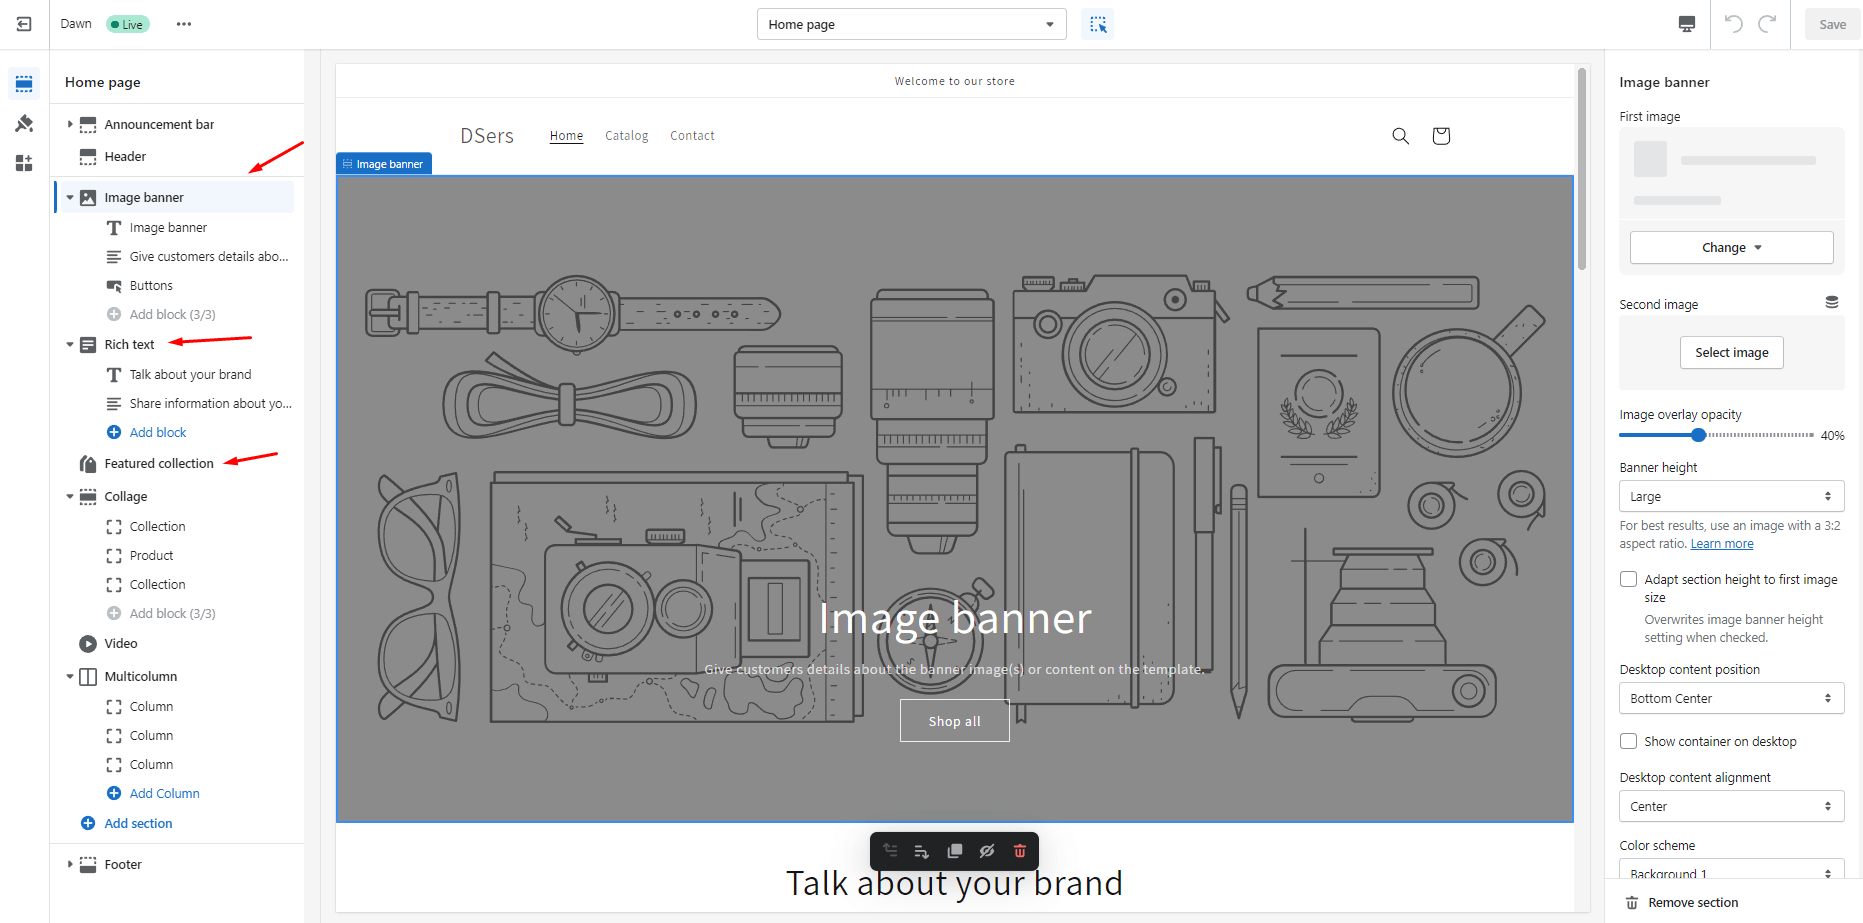
4. Editing Individual Movable Sections
Except for the Header and Footer, all other document parts are generally editable. The update or alteration you make will only affect the template you are working on, according to this.
All Shopify layouts typically have the following movable elements:
- Image banner: A marketing component on Shopify designs called an image banner gives you the option to advertise your business and provide customers information.
- Featured collection: A business owner might exhibit a specific selection of items in a distinct section designated to draw people and persuade them to make a purchase.
You merely need to click on any of them to get the unique customization choices available to you.
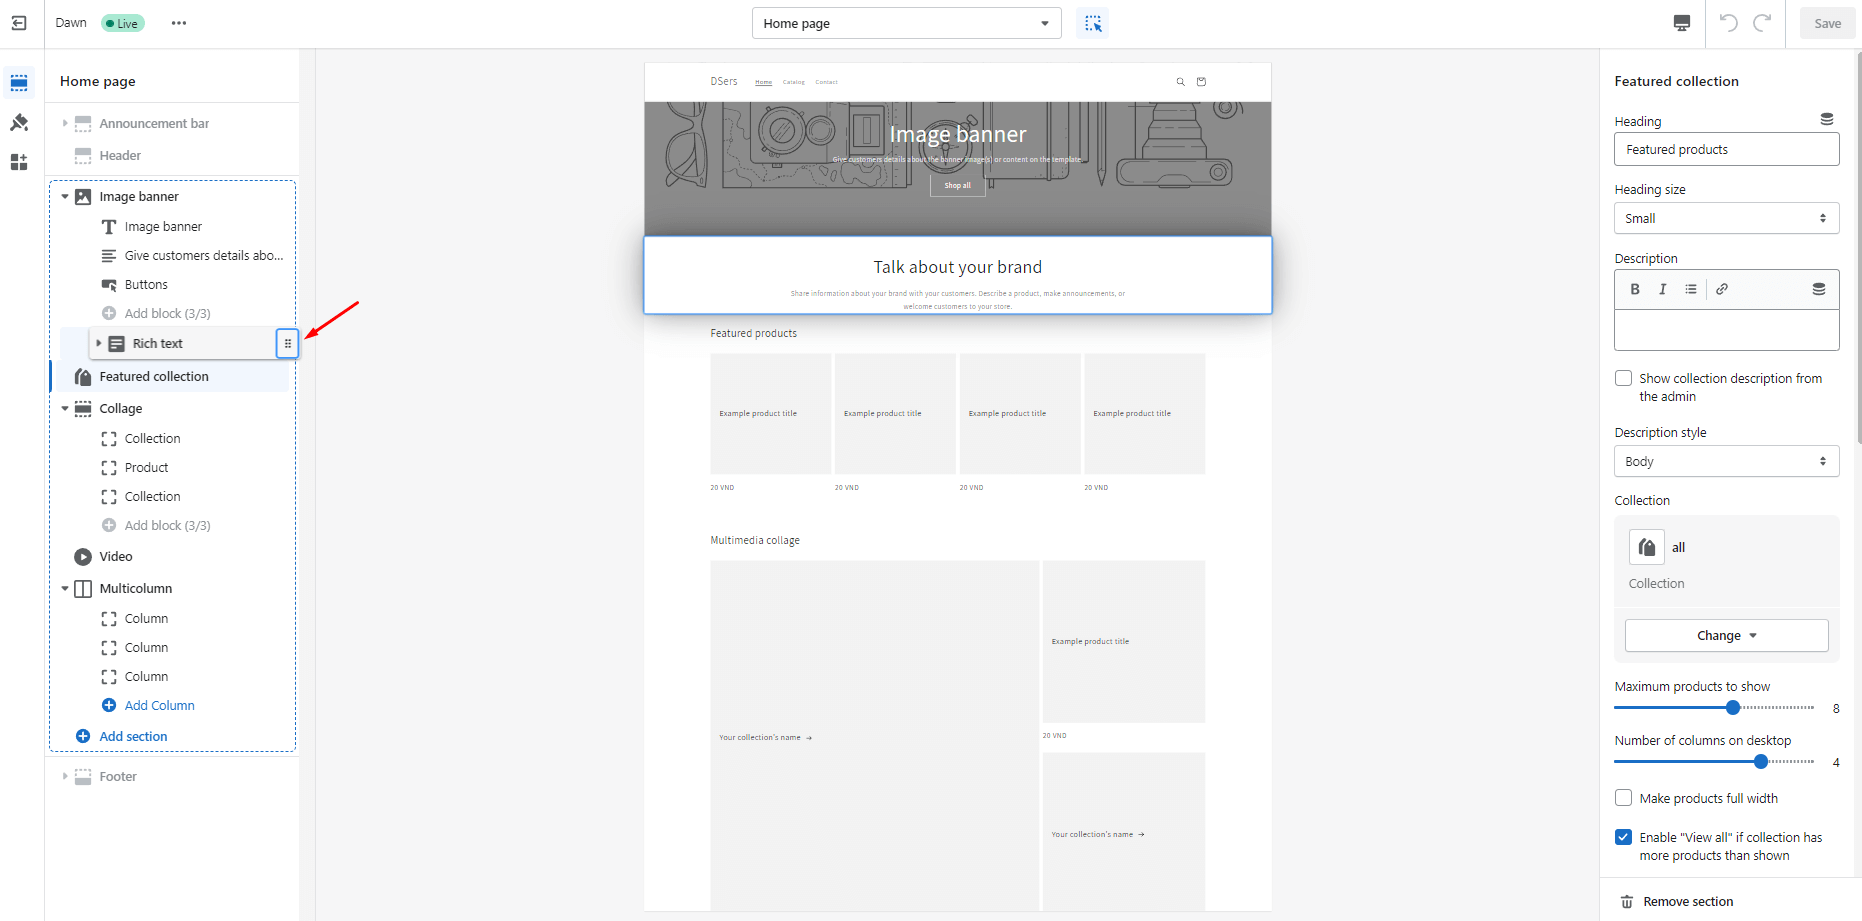
5. Add/Move/Remove A Section
You are free to add as many parts as you like to your custom themes, but you should proceed with extreme caution because doing so might negatively affect how quickly and how well your website functions.
Add a section: As part of their moveable section list, all Shopify layouts frequently have an Add section button. Select Add section and then look for a theme part that fits your requirements based on your choices.
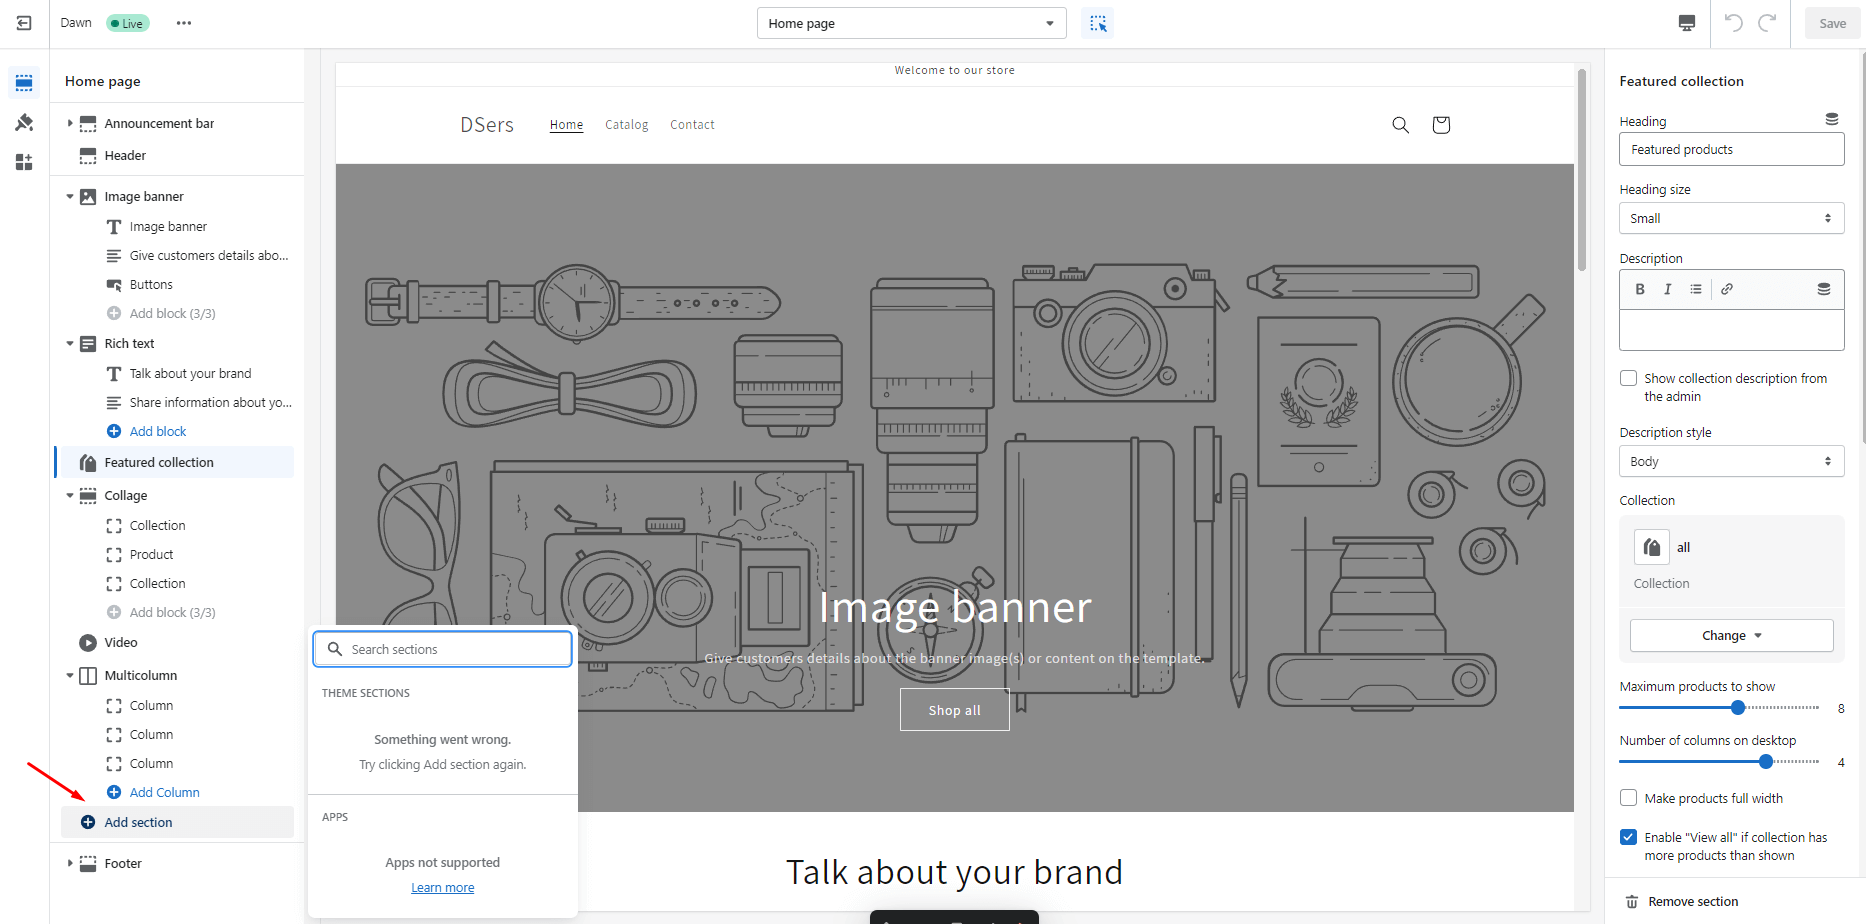
Move a section: Return to the segmented category list, put the mouse over any part until a six-dotted icon appears and the cursor changes to a panning icon, then click and drag the section to the desired location. Repeat the procedure to reorganize your customized template if you decide to change your mind later.
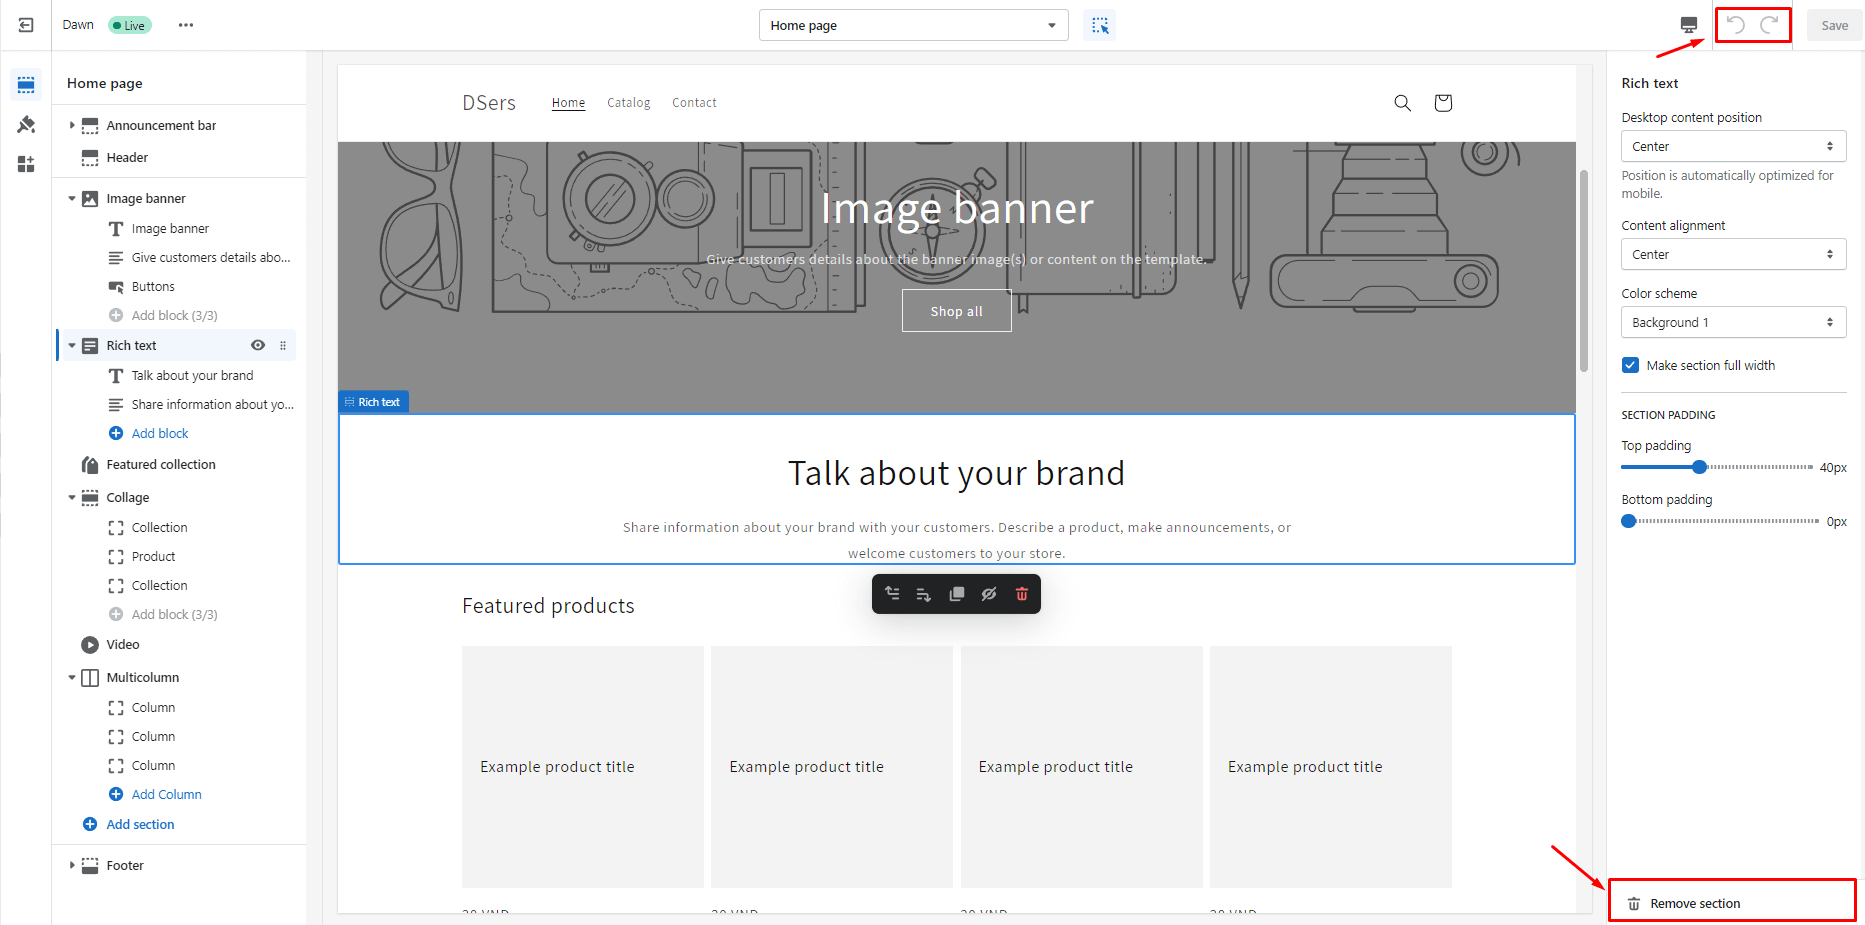
Remove a section: While adding additional sections can appear more important, you must also eliminate unnecessary units. To accomplish this, select the section title (which, in our case, is the picture banner), scroll through the customization choices, and then click the Remove section on the very last page. Always make sure to read over the preview version to check whether it fits what you had in mind before clicking Save to make the changes. If it doesn't, you may undo your earlier modifications by clicking the Undo symbol, which is located in the upper right corner next to the green save button.
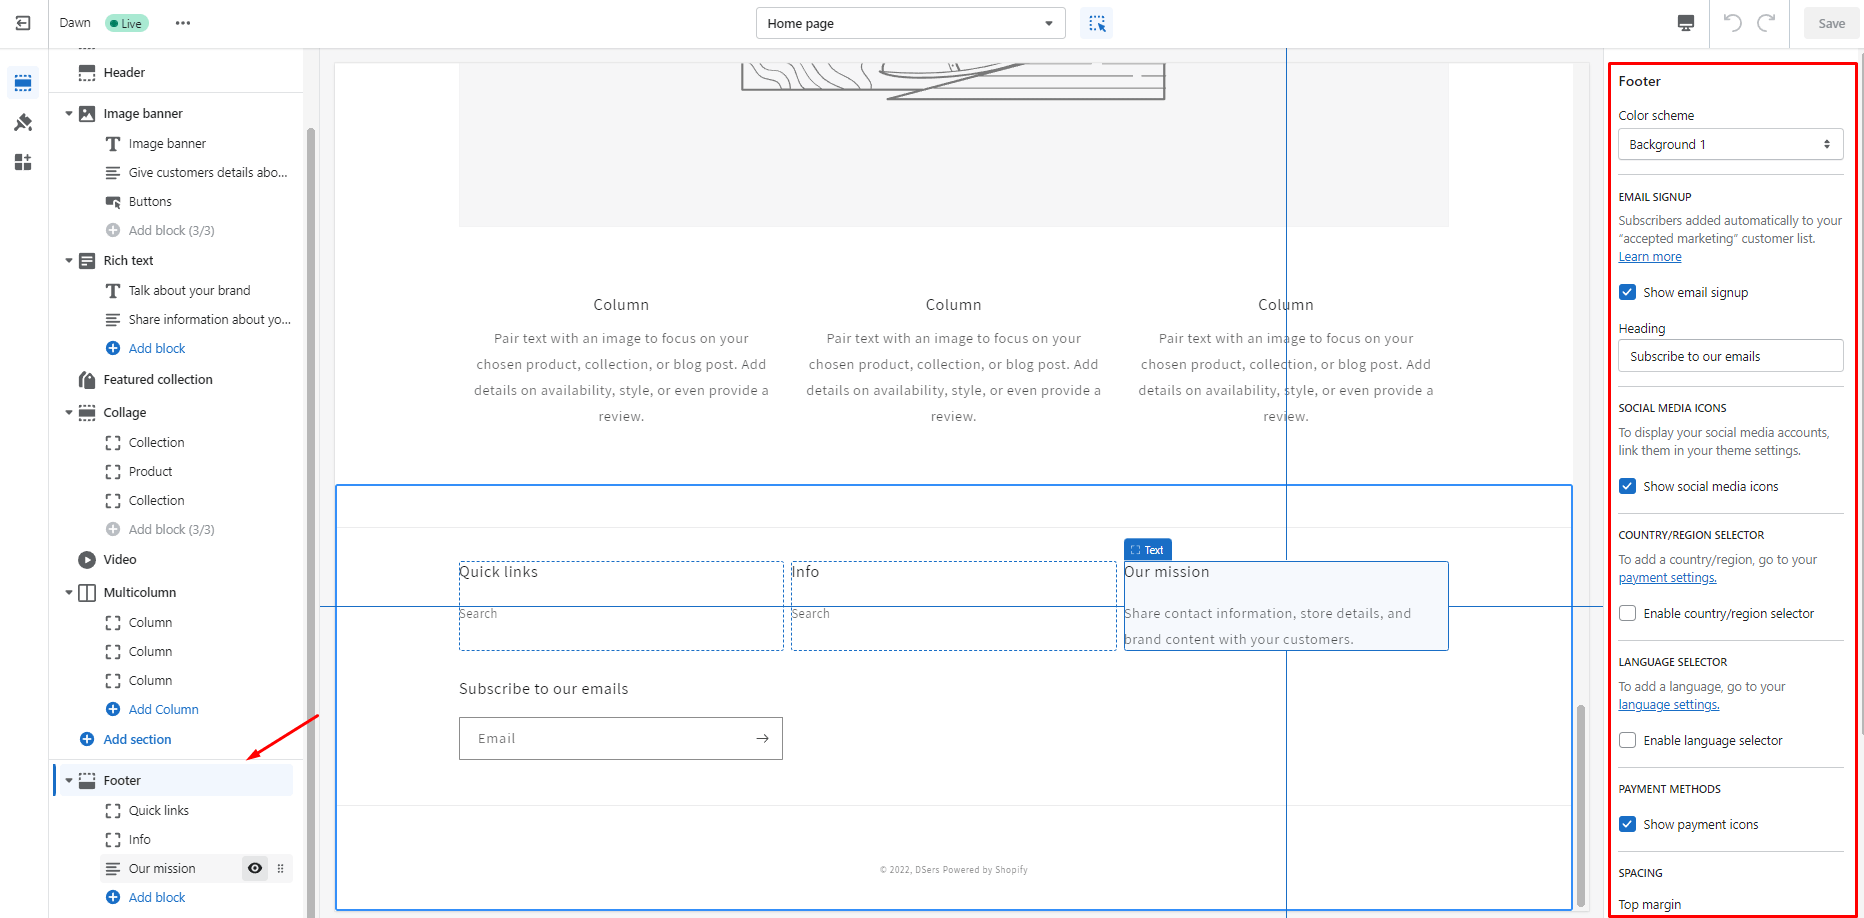
6. Customizing Footer
The Footer section, as its name indicates, refers to the region at the foot of each page on your Shopify website. This section often includes social media accounts, links to privacy policies, a copyright statement, a sitemap, and email registration forms.
Like the header, theme selection also has a significant impact on the customization choices for the Footer. But with all of them, the customizing procedure is the same. Color scheme selection, email signup choices, social media platform integration, payment settings, and language selection are some of the popular customization options.
Simply scroll to Footer on the sections panel, click it to make your desired changes, and then click Save to apply them.
7. Altering Theme Settings
To begin, select the Theme Settings button to see the various theme modification choices. These include favicon, social media, color, typography, styles, and checkout. Here are some customizations you should consider:
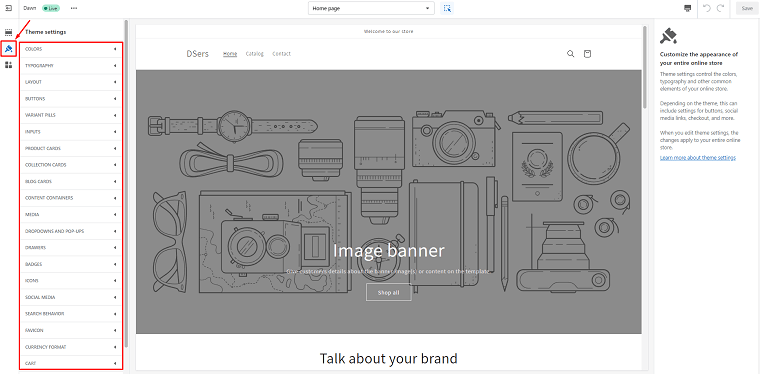
Change theme color: To alter the color of your Shopify theme, choose the Color menu item and alter the color settings for accents, backdrops, foregrounds, solid button labels, outline buttons, and text links.
Change theme typography: This allows you to change the typefaces used for headers and body text on your shop pages by selecting the Typography option, then Change.
Change theme styles: To access the many options to experiment with, simply click Styles.
Change social media sharing: With Shopify, choosing Social Media will let you quickly connect and personalize your social media sharing options.
Change the favicon: After a website loads, a little image called a favicon is often seen in the address bar or tab of your browser. Use the Favicon option and click Select Image to make the necessary modifications. Shopify will automatically reduce the favicon picture you choose to 32x32 pixels when you make your choice.
Change checkout: Increasing store conversion and lowering cart abandonment rates are made possible by checking out. Change whatever checkout settings you like by selecting the Checkout option from your Shopify theme.
Bonus Tips: Get Great Shopify Custom Design
Making a Shopify custom design is not a totally simple task. Here are some tips that may be helpful for you.
Invest in a Great Theme
The collection of well-created themes is the main factor drawing so many firms to Shopify as their eCommerce platform. In addition to having a platform that even the least "tech-savvy" person can use easily, Shopify's professionals provide gorgeously designed themes that are enhanced to boost sales. Invest in one.
Hire a Shopify Designer to Customize Shopify Store
The easiest method to alter your theme is to hire a Shopify specialist. While you concentrate on growing your company and your plan, with their assistance, you can make sure that your store has the necessary visual appeal and usefulness.
| Get Started Now to Grow Your Online Business with the Best AliExpress Dropshipping Tool - DSers! |

First, pick a theme, then work with a designer to incorporate your brand into various theme areas. You may provide that design to a Shopify developer once satisfied with how the home, interior, and product pages appear.
Final Words
Shopify offers businesses a great deal of freedom and flexibility to develop original themes and consumer experiences. On the Shopify platform, almost anything is feasible. It's time to build an eye-catching online store for your company now that you understand how to modify a Shopify website. Discover more eCommerce guides on DSers Blog.


 Company
 Why Choose DSers
 Blog
Blog
 Help Center


 Live Chat
